TMUX is a terminal multiplexer. It enables a number of terminals (or windows), each running a separate program, to be created, accessed, and controlled from a single screen. tmux may be detached from a screen and continue running in the background, then later reattached.
TMUX is especially useful when used on remote systems given that it will automatically detach and background itself if the remote SSH connection breaks saving your remote terminal sessions and running programs. You can then reconnect later on and reattach your terminals and running programs.
This plugin will configure a TMUX session for your CLUSTER_USER that contains a terminal session on each node in a separate TMUX window.
To use the TMUX plugin add a plugin section to your starcluster config file:
[plugin tmux]
setup_class = starcluster.plugins.tmux.TmuxControlCenter
Next update the PLUGINS setting in one or more of your cluster templates to include the TMUX plugin:
[cluster mycluster]
plugins = tmux
The next time you start a cluster the TMUX plugin will automatically be executed. If you already have a cluster running that didn’t originally have tmux in its plugin list you can manually run the plugin using:
$ starcluster runplugin tmux mycluster
StarCluster - (http://star.mit.edu/cluster)
Software Tools for Academics and Researchers (STAR)
Please submit bug reports to starcluster@mit.edu

>>> Running plugin tmux
>>> Starting TMUX Control Center...
>>> Creating TMUX Control Center for user 'myuser'
>>> Creating TMUX Control Center for user 'root'
Next login as root or CLUSTER_USER and use your cluster TMUX session:
$ starcluster sshmaster mycluster -u myuser
myuser@master $ tmux a
This will attach your terminal to the remote TMUX session. It should look something like this:
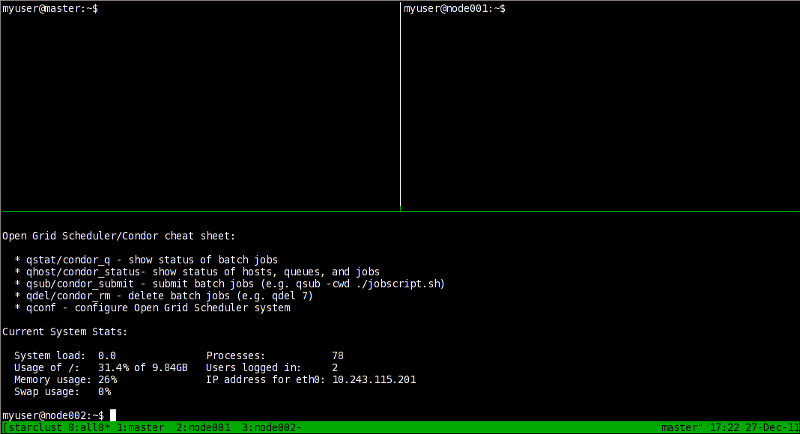
You’ll notice at the bottom there are 4 windows open. Since this is a 3-node cluster the first window is split into 3 panes with each pane logged into a separate node. The remaining 3 windows are all individual SSH sessions to each node in the cluster. If the cluster is large, you will notice multiple all windows each containing a group of panes logged into a subset of the cluster nodes. This avoids the all windows being split so much that the terminals are unusable. Read the next section to learn how to use navigate these TMUX windows/panes.
In order to take full advantage of TMUX you need to become familiar with some of the basic keyboard shortcut commands. It is highly recommended that you read this blog post for an excellent tutorial on how to use TMUX. Below are the basic keyboard shortcuts for reference:
Note
If you’re used to screen or don’t care for prefixing commands with Ctrl-b you can change this by putting the following in your $HOME/.tmux.conf:
set -g prefix Ctrl-a
You can then replace Ctrl-b with Ctrl-a in the shortcuts listed below.
| Command | Description |
|---|---|
| Ctrl-b c | Create new window |
| Ctrl-b d | Detach current client |
| Ctrl-b l | Move to previously selected window |
| Ctrl-b n | Move to the next window |
| Ctrl-b p | Move to the previous window |
| Ctrl-b & | Kill the current window |
| Ctrl-b , | Rename the current window |
| Ctrl-b % | Split the current window into two panes |
| Ctrl-b q | Show pane numbers (used to switch between panes) |
| Ctrl-b o | Switch to the next pane |
| Ctrl-b ? | List all keybindings |
See also
See the official TMUX documentation for more details.